How to Connect Stripe to your online store
Follow these simple steps to set up and connect your Stripe payment gateway to Hostatto.
Step 1: Open Stripe Settings in Hostatto
From your main Dashboard, go to the Getting Started section. Look for item 5. Payments (Stripe) and click the Stripe Pro button to start connecting your Stripe account.
Step 2: Start the Connection
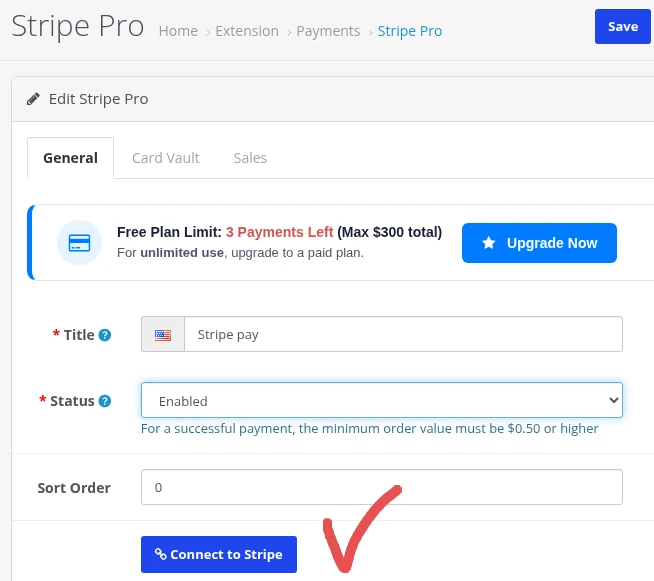
On the Stripe Pro settings page click the blue Connect to Stripe button.
Step 3: Enter Credentials
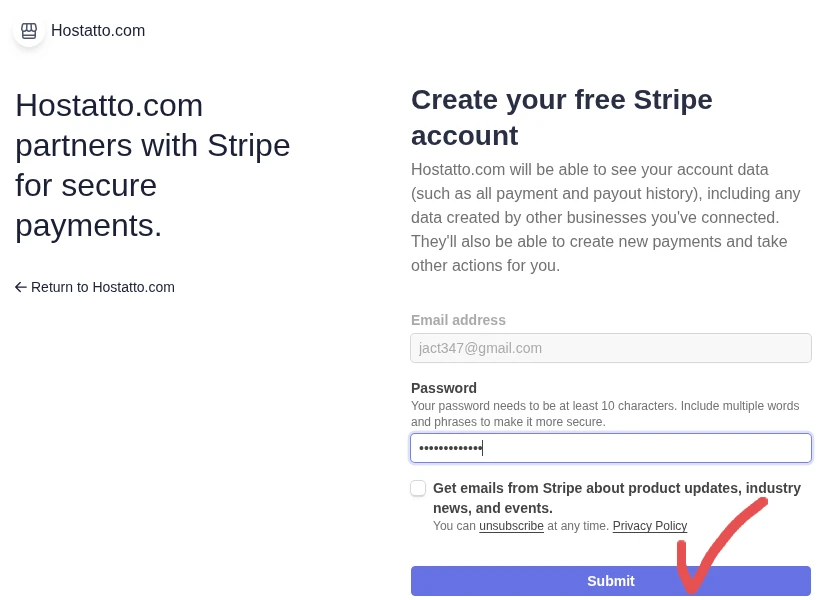
Enter your email address, set a secure password for your account, and click Submit.
Step 4: Select Your Account and Connect
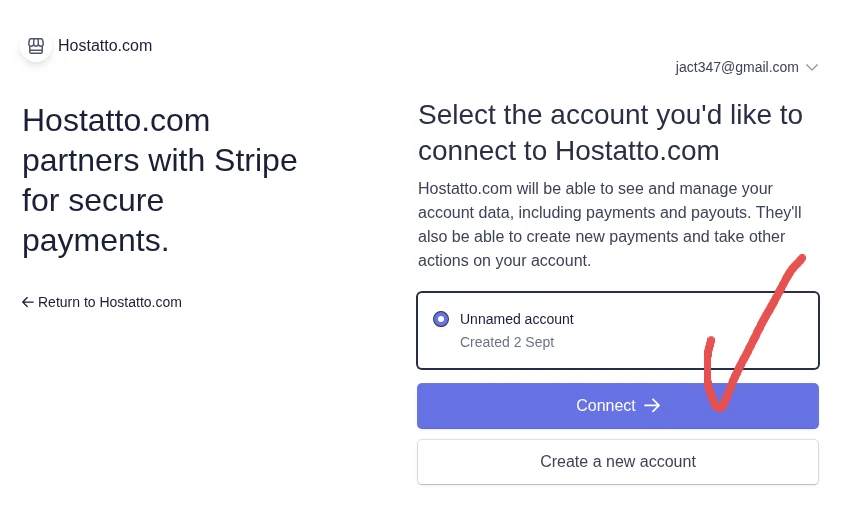
Select the Stripe account you want to connect to Hostatto.com and click the blue Connect button.
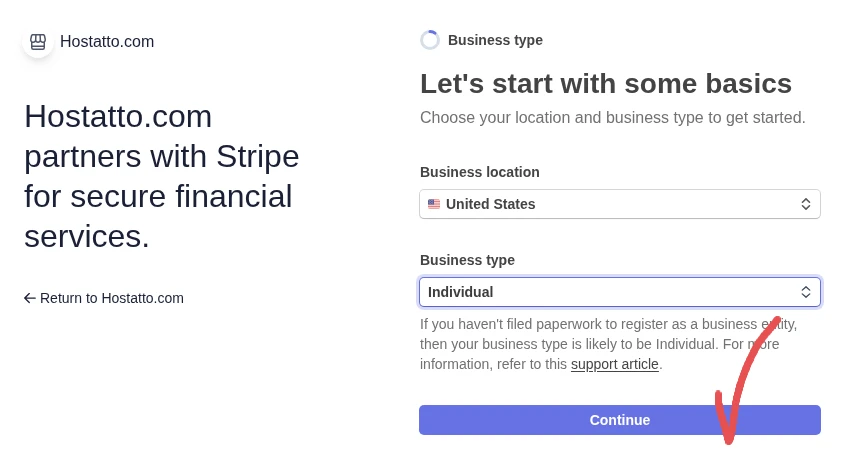
Step 5: Select Business Type
Select your Business location and choose your Business type, then click Continue.
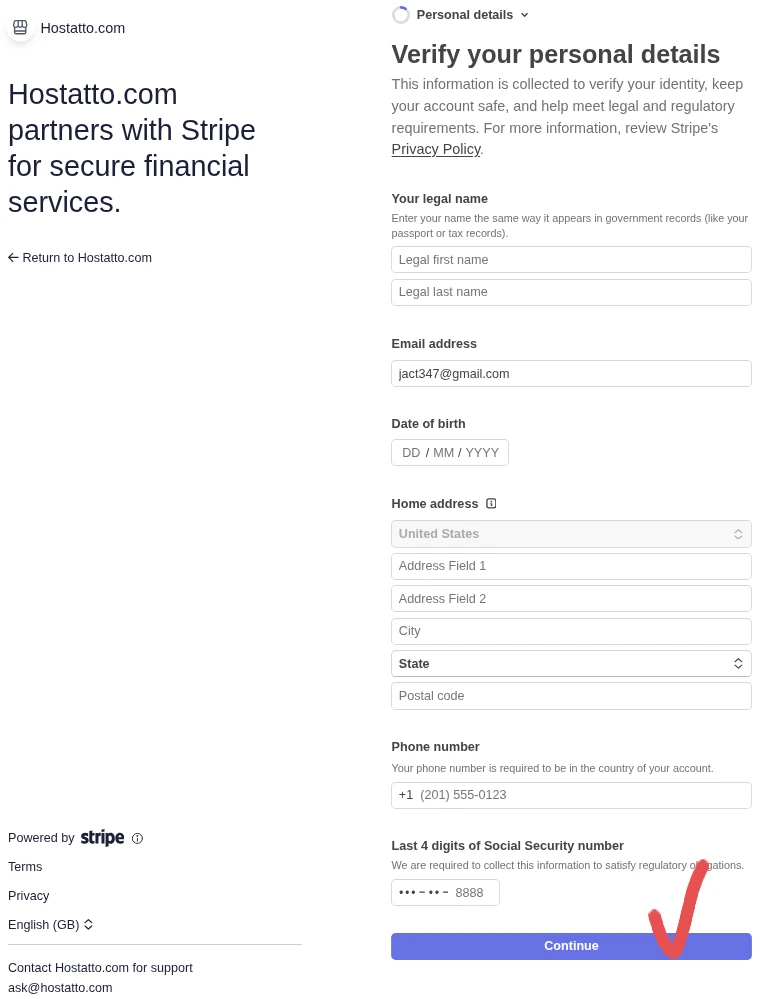
Step 6: Verify Personal Details
Fill in your legal name, date of birth, home address, phone number, and required identification details, then click Continue.
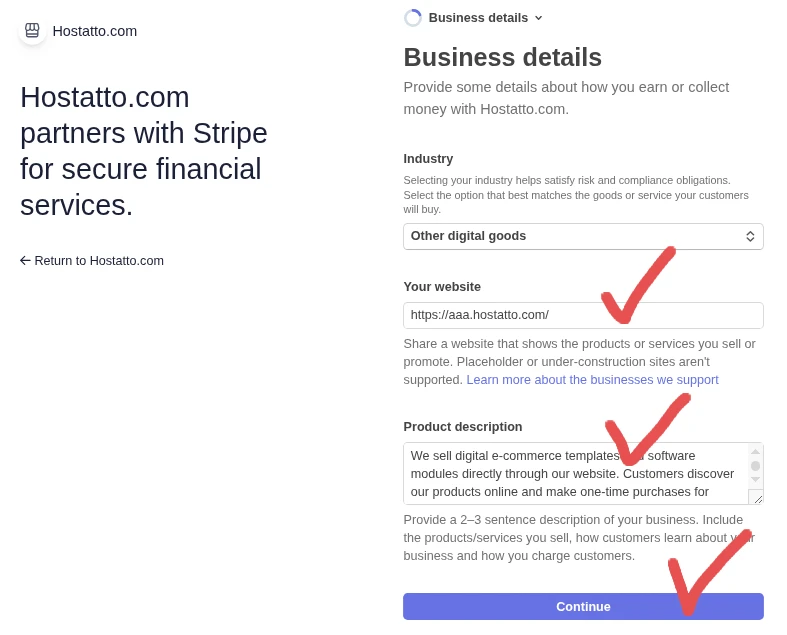
Step 7: Enter Business Details
Select your Industry, provide your store's Website URL, write a brief Product description, and click Continue.
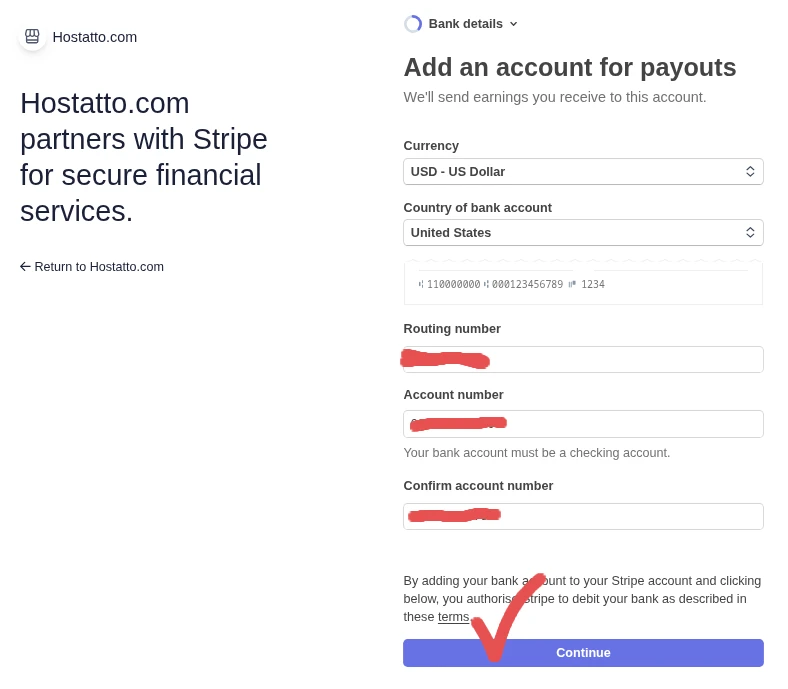
Step 8: Add Bank Details for Payouts
Enter your bank's Routing number and Account number where you wish to receive payouts, then click Continue.
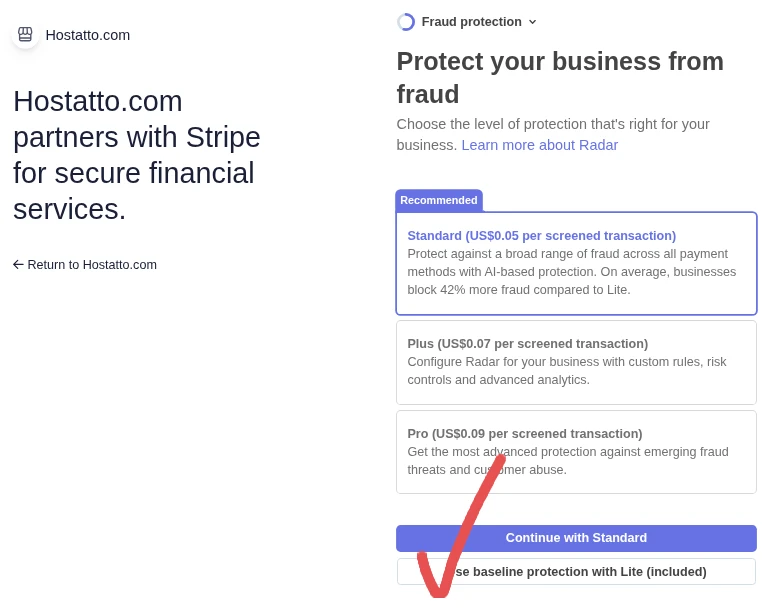
Step 9: Choose Fraud Protection
Select your preferred fraud protection level or click Use baseline protection with Lite (included) to continue.
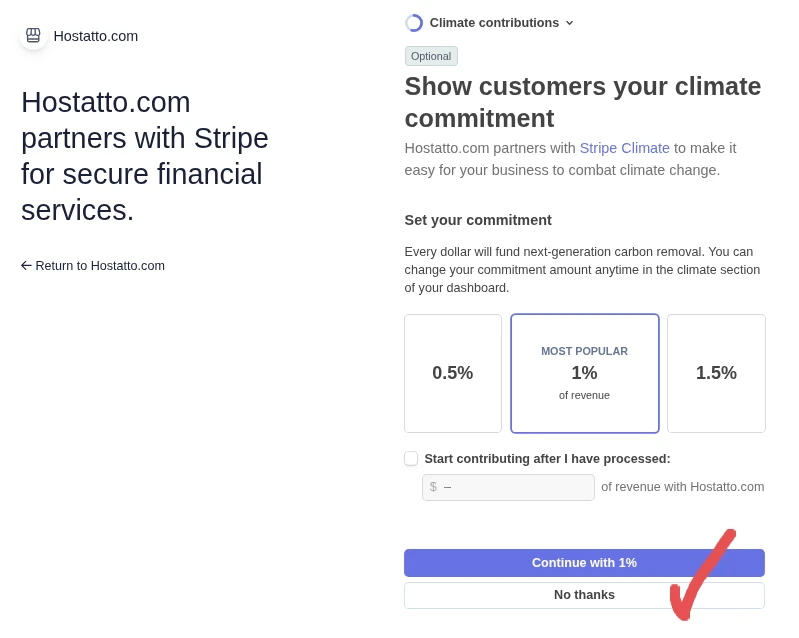
Step 10: Climate Commitment (Optional)
Select a contribution percentage if you wish to support carbon removal, or click No thanks to skip this step.
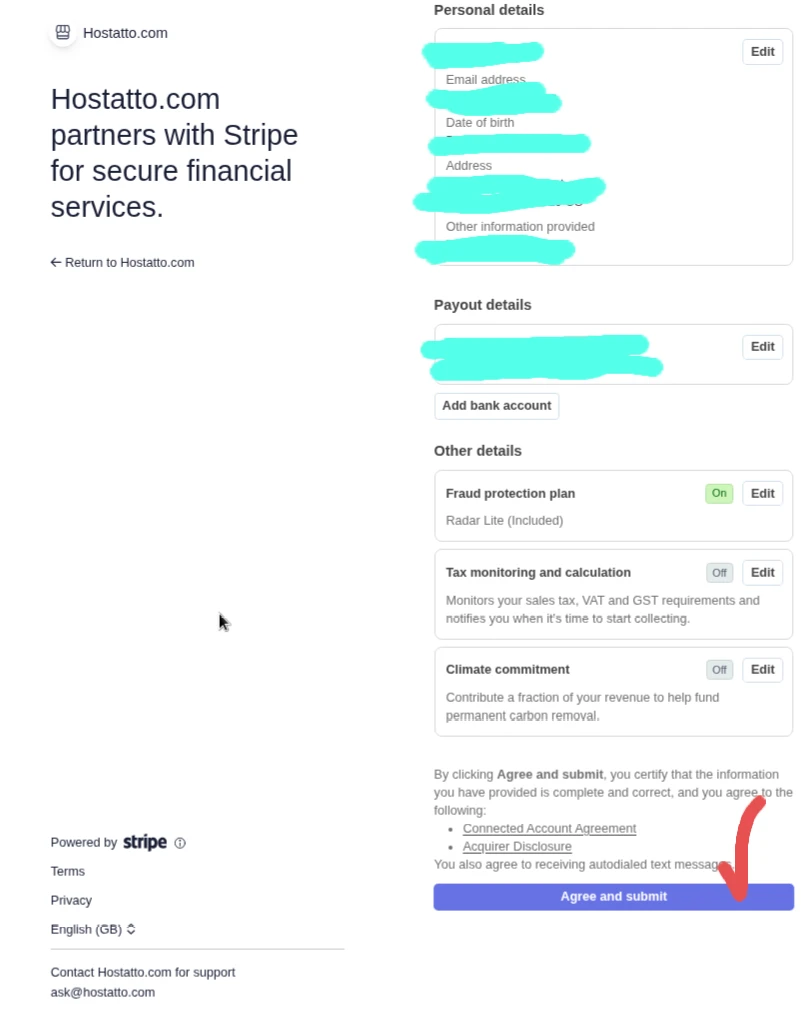
Step 11: Review and Submit
Review all your entered information for accuracy, then click Agree and submit.
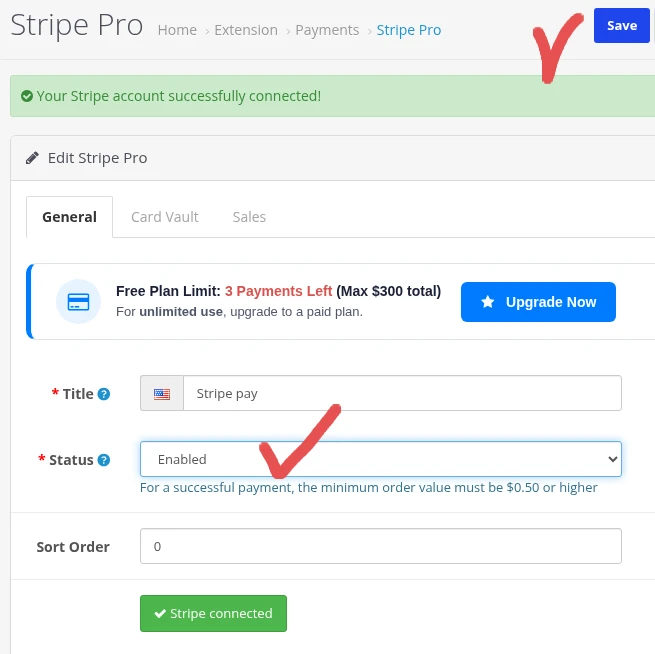
Step 12: Save Connection in Hostatto
Once redirected back to your Hostatto admin panel, make sure the status shows Enabled and click the blue Save button in the top right corner.